SSL Certificate Installation on Microsoft IIS 10

Installing an SSL Certificate
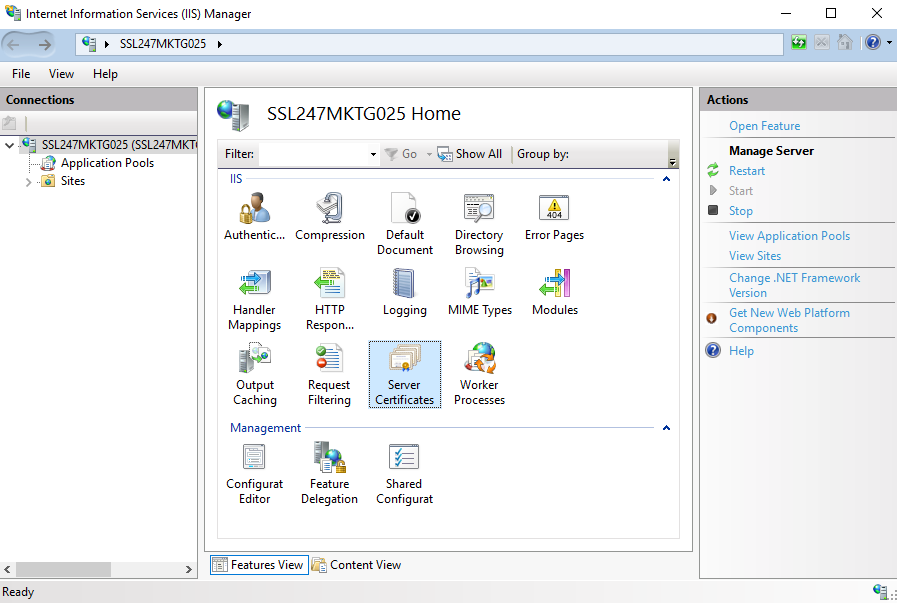
- Launch Internet Information Services Manager
- Select the Server Certificates option from the menu icons
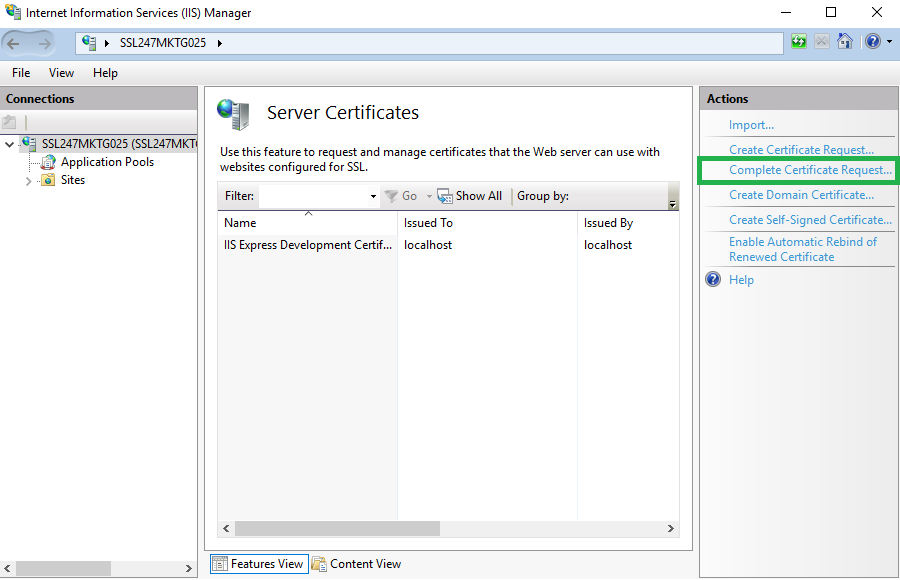
- Once the Server Certificates page is open, select Complete Certificate Request
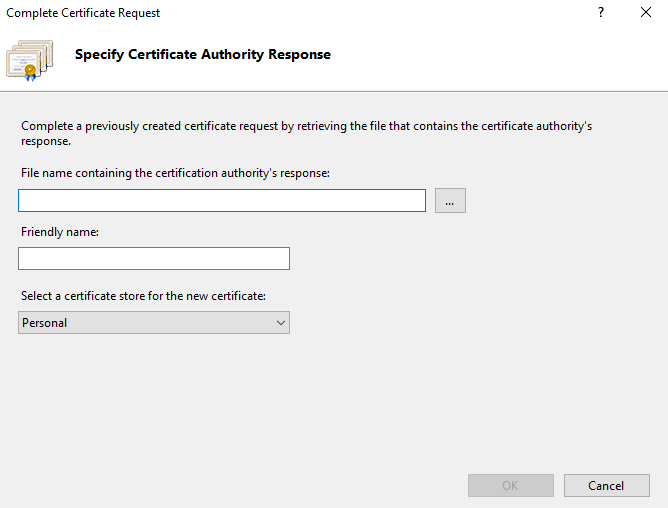
- The next step will require input for 3 fields in Specify Certificate Authority Response
Friendly Name - This will assist in locating specific certificates when required, e.g. a specific domain name
Select a certificate store for the new certificate - Do NOT adjust unless authorised
- Select OK to import the certificate
- The new certificate should appear in the list located on Server Certificates
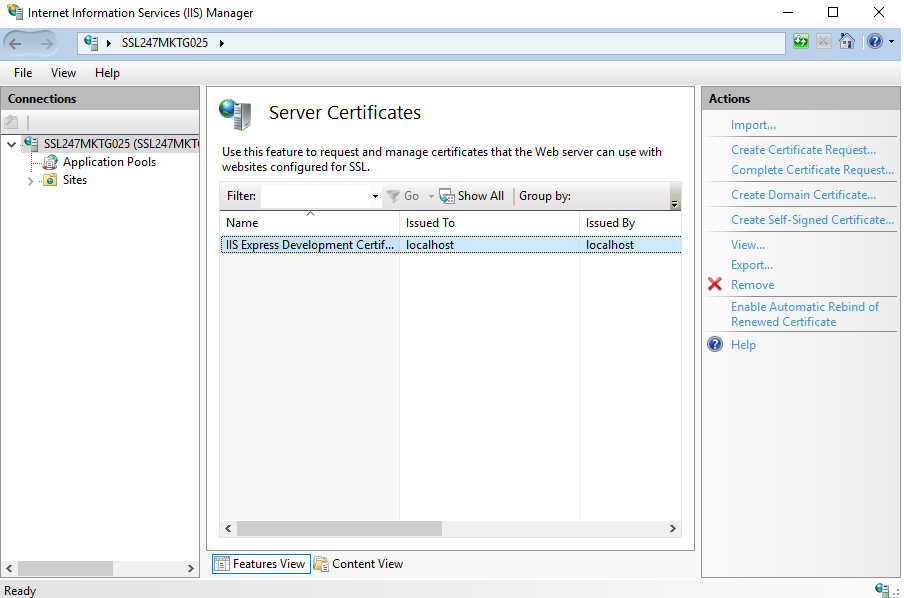
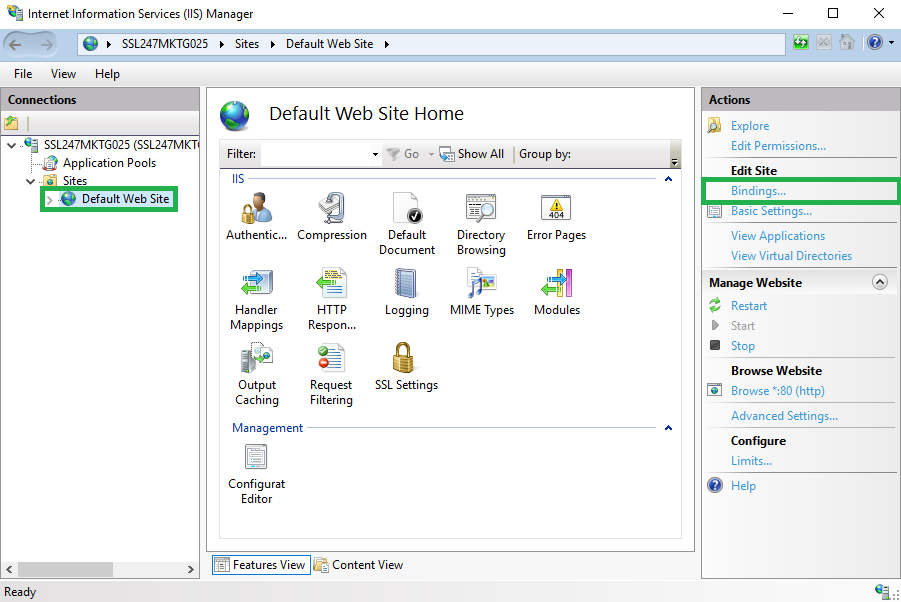
- To SSL certificate can now be assigned to a website by binding to a secure port. Open the Sites sub-folder located in the Connections panel on the left, then select the site.
- In the Actions tab click on Bindings
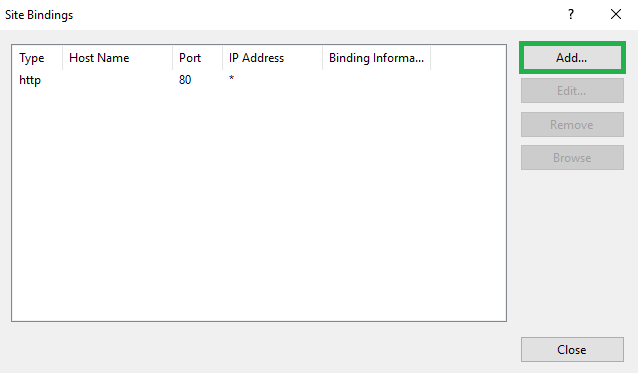
- A Site Bindings window will appear. Select Add
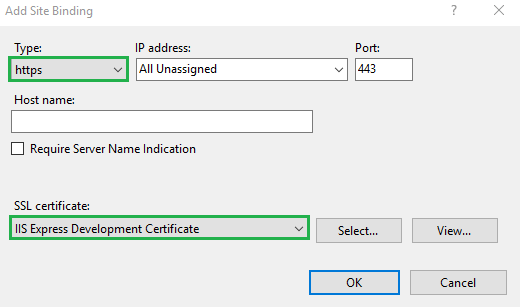
- The next phase of the process will require the following fields to be modified:
IP Address - choose the IP address or keep as "All Unassigned"
Port - the default is 443, specify port number for a secure connection
SSL Certificate - select the corresponding certificate, which is identified by its friendly name
- Once the fields are modified and saved, select OK to complete the binding process. This will enable the new certificate to appear in Site Bindings
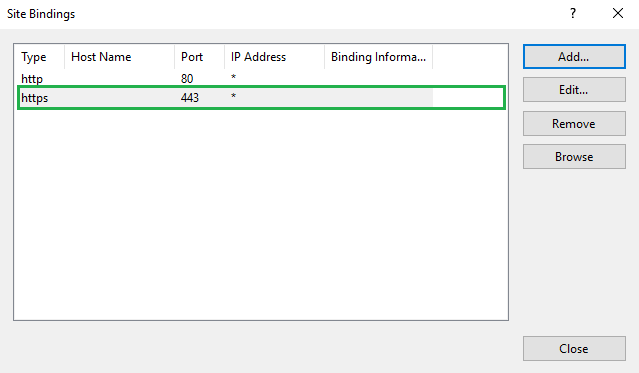
The SSL certificate should now be installed and the website can be accessed securely through a HTTPS connection
